Friday, August 27, 2010

Plum Chutney/Jam

I have to admit right away I had NO idea whatsoever what I was doing when I made this. It's simply a bunch of fruit, either too ripe to eat or too sour for my personal taste, thrown together in a pot with some sugar and a bit of liquid, simmerred until it was all cooked and reduced by about 1/3...I thought it was gonna be more like a chunky jam, but it turned out more like chutney. Either way it's amazing on toast, or meat. So it's both!

I used black plums, the mini ones. They were a little too sour for me, even after sitting on the counter for one week. I just chopped them up in quaters, without peeleing because the peel here gets really soft. I think I had about 2 cups of those. Also in there I threw in some ground cherries. Unusual I know but they were also dying in their little basket so in the pot they went. I cut the bigger ones in half and left some whole. Total amount here is unknown...I'm guessing about 1/2-3/4 cups..?(I'm really bad with mesuring when I cook!) Finally I tied it all with an apple, peeled and chopped finely.
In a pot with about 1/4 cup of sugar and 1/4 cup apple juice, I let it simmer and stirred occasionnaly for about 30 minutes, or maybe 45...added some golden raisins about half-way(i believe it was about 1/2 cup...), 1/2 teaspoon ground ginger, a bit of cloves, pinch of salt and a squeeze of honey. Here it's up to you to add more sugar, depending on how tart you like things...
When it got to a nice thick consisitency I turned off the heat and let it cool.


Now I have to apologize for the lack of pictures...it was a little tricky to get the right color to come out...this is the only one I was able to get that actually looks like it really is! Dark and chunky and really delicious. Alos I didn't know how it would turn out so I didn't really "document" anything during the process...sorry...next time...

I can't wait to experiment and make other sorta chutneys and jams with different fruits!

Tuesday, August 24, 2010

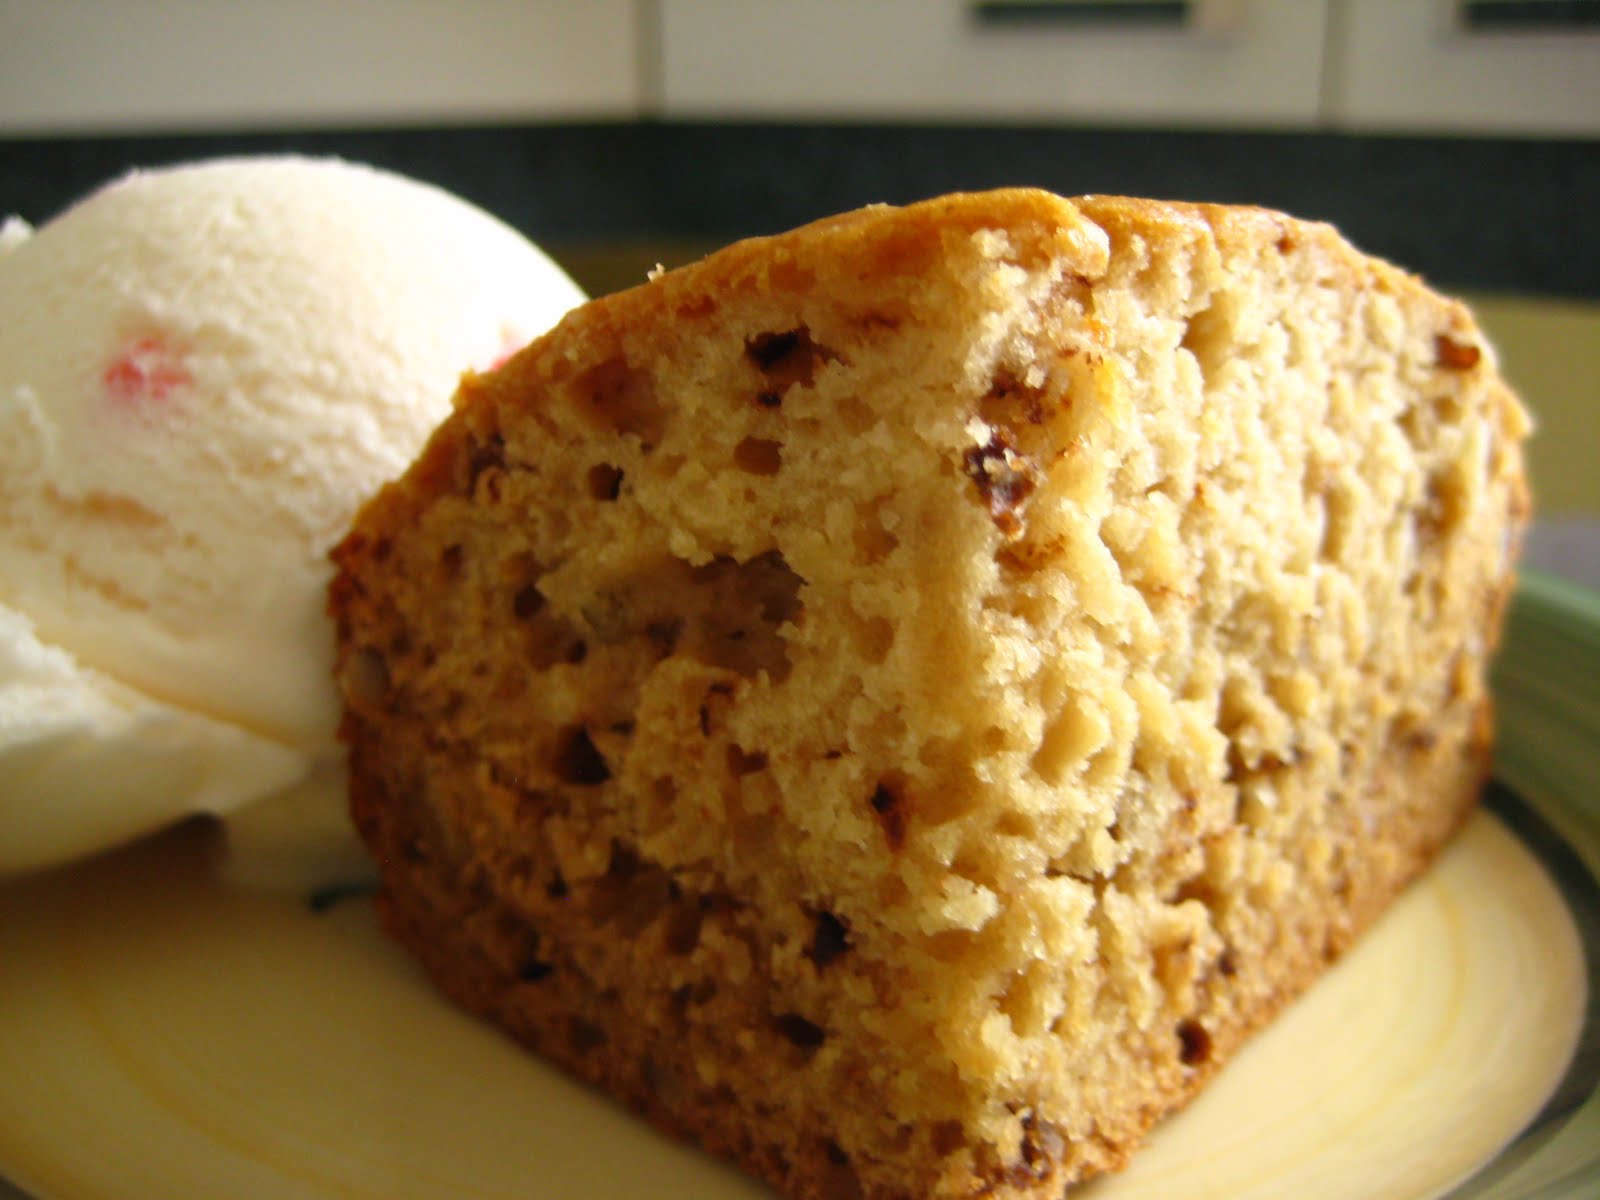
Banana Chocolate Chip Bread


Whoever invented/came up with using bananas for baking is a genius. I mean, really! They're amazing for muffins, and cakes, and well, bread. And it's kinda recomforting to know that when there's 2 bananas on the counter, dying and blackening as days go by, it's not a total loss...in fact I almost, sometimes, let them "mature" on purpose, so that I have an excuse to bake something!!
So this week I was gonna, again, make muffins, but I decided to make a loaf for something different, and for some new material for this blog(yes, I'm still thinking of you, readers, even if I don't show up on here all that often..:))
This recipe came form "Healthy Oven", yet again. It uses buttermilk, but if you're unable to find buttermilk(or in my case decide at the last minute to make a loaf rather than the usual muffins...)make your own:
2/3 cup plain low-fat yogurt+1/3 cup 1% milk=1 cup buttermilk.
It's that simple, and it works!
On to the recipe:

Dry ingredients:

2 cups flour(mix half whole wheat, half all-purpose...)
1 tsp baking soda
1 tsp cinnamon
1/2 tsp grated nutmeg
Pinch of salt

Wet ingredients:

1 cup packed dark brown sugar
1 cup mashed ripe bananas(about 2 bananas)
3/4 cup unsweetened applesauce
1/2 cup low-fat buttermilk
1 large egg
1 TBSP canola oil
1 tsp vanilla extract

1/2 cup mini chocolate chips

Directions:


Mix all the dry ingredients and set aside.
Mix all the wet ingredients, by hand or with a mixer for about 2 minutes, making sure everything is well combined.
Pour the wet in the dry, add chocolate chips and mix, without over mixing though or you'll end up with a tougher loaf. In this case it's ok if there are still lumps of flour here and there...
Pour in a greased 9x5x3 loaf pan, smooth the top with a spatula and sprinkle more choco chips on top(!!!).
Bake in a 350F oven on the middle rack for 55-60 minutes.
Cool for 10 minutes while still in the pan, unmold and cool completely on a cooling rack...


or...if you have no self control like me have a few slices while it's still too hot and burn your tongue...(no seriously, don't. it hurts...)

It's an AMAZING loaf, really, even after 4 days!

Tuesday, August 17, 2010

Carrot Raisin Bread

It seems like it's been forever since I last made a loaf of bread...but I'm happy to say I haven't forgotten the pattern!!


I had the day off today, and with a big ol' bag of carrots in the crisper, begging to be used for something, I came up with this recipe. The carrots and raisins add sweetness, and the quinoa taste comes out really nicely. I used bread flour AND all-purpose flour, to make the dough lighter, but also because I ran out of bread flour(oups..). If I make this again eventually I will use more ginger and maybe even a little cloves, to spice it up a bit.
I was also really pleased with the nice color of the finished loaf. And this time I got the braid pattern right!
So here's the formula:

2 1/2 cups bread flour
1 cup all-purpose flour
1/2 cup quinoa flakes
1 1/2 tsp instant yeast
1 tsp salt
1/2 tsp ground ginger
2-3 carrots
2 TBSP light olive oil
1/2 cup raisins
1- 1 1/2 cup carrot's cooking water
1 TBSP honey

Directions:

-Peel and cut the carrots in small cubes and boil until tender. Let cool and RESERVE THE WATER!!
-In the carrot water, soak the raisins, add in the honey.
-Mix flour, quinoa, yeast, salt and ginger.
-Mash the carrots with olive oil and a pinch of salt.
-Pour the water in the flour mix while stirring with a fork, when it starts coming together add the raisins and the mashed carrots and mix until in comes together in a ball. You may need to add more water or flour, so have the bag of flour on hand. I keep some in a small bowl so that my flour remains plain and "virgin" so to speak...
(*On a side note, this part was really messy for me. Stickyness, lumps of dough and carrots and raisins stuck to my fingers, I kneaded in the bowl for about 5 minutes before transfering to the table. But it worked out fine in the end...That's the thing about bread, even if it seems like it's not happening, it most probably will, it just takes time. Patience is a virtue in this case...)
-Transfer to a working surface, floured lightly and knead until the dough is soft and no longer sticky(mine was still a BIT sticky, but it's better that than tough and dry!).
-Put the dough in an oiled bowl and cover with a clean dish towel. Let it rise until doubled in size, about 1 hour.
-Punch the dough down and shape(braid, or whatever...)
-Put the loaf in an oiled pan and let it rise again until doubled, another 30-45 minutes.
-Brush with milk and bake in a 375F oven, on the middle rack, for 10 minutes, turn down the heat to 350F and bake 25 minutes. Then turn off the oven and leave the bread in for about 5 minutes.
-When it's done it'll sound hollow when tapped at the bottom, or an instant thermometer will read 170F.
-Cool on a rack and marvell......


I will submit this to yeastspotting, a nice site about bread and baking.

Saturday, August 14, 2010

Tomato and Basil Spaghetti

Yes, this is a new post...
I really have to apologize, again, for being so distant...it's not you, it's me...

So. Yesterday I actually COOKED! Well, it was a quick, under 30 minutes easy meal before running out the door, but still. Last time I made a plate of pasta...I don't even know.
This is not really a "recipe", per say, but all things that match so well thrown together for a fresh little lunch:


Cooked spaghettini
Different colored tomatoes, cut in 4(or half if they're small...)
Garlic
Button mushrooms
Fresh basil(yes, the plant is still alive!!! and H-U-G-E!)
Olive oil and butter

Sautee the garlic and mushrooms in the butter and oil until it's semi-cooked. Preferably on medium heat and stir often so the garlic doesn't burn...Add the tomatoes, season with salt and pepper, cook for a few minutes until soft but not totally mushed. The idea is to keep the tomatoes chunky and looking like tomatoes, rather than sauce. Add basil at the end, throw in the pasta, stir to combine and voila. It's easy isn't it? Oh, and if you'd like you could drizzle a little olive oil on top, but I was a little generous with the oil in the beginning so I passed on the drizzle...


I should really start cooking again...

Tuesday, July 13, 2010

Wheat Germ and Oat Bread.

I finally got the AC installed in my appartment!! So turning on the oven is not a torture session anymore. And since today was a day off and I just ran out of bread... guess...yes, homemade loaf! The past couple of weeks I was able to bring home some bread from work, and even though it's bakery bread its not quite the same.
So I made up this loaf, that I might admit tastes phenomenal and turned out almost perfect! I don't have a lab at home where I can test howrich in fiber it is but I'm sure it's pretty high. The texture is dense but still light at the same time. And the crust is nice and, well, crusty, and flavorful!


3 1/2 cup bread flour
1 cup quick oats
1/2 cup wheat germ
1 1/2 tsp instant yeast
1 tsp salt
2 TBSP dry milk powder(optional)
1 TBSP sugar
1 egg
3/4 cup milk
3/4 cup water

Mix all the ingredients appart from the egg, milk and water.
Heat up the milk and water until a thermometer reads about 110-130F.
Pour the liquid in the flour mix, stir with a fork, add egg, knead until it comes together, transfer to a flouredsurface and knead for 10 minutes until it becomes a smooth ball of dough.
Put it in an olied bowl and let it rise for about an hour, until it's doubled in size.
Shape in the desired form (here I just folded it and put in an oiled loaf pan),
proof for about 30-40 minutes, again until it's doubled.
Score 3 slits accross the dough, brush with egg whites and sprinkle some wheat germ on the top.
Bake at 400F for the first 5 minutes, then turn down the oven at 375 and continue baking for 20 minutes, then turn down at 350 for the last five minutes. When the bell rings(prviding you use the oven timing thing...), turn off the oven but leave the loaf in for another 5 minutes.
This should do it. If it's ready it'll sound hollow when tapped at the bottom.
Then cool on a rack(NOT in the pan!!) and congratulate yourself on a beautiful loaf of healthy bread!!


I'm sending this over to Yeastspotting!!

Thursday, July 8, 2010

Orange-Mango Smoothie

For those of you who live in or around Montreal, you KNOW what I'm talking about when I say: HOOOOOOOOOOLLLYYYYYYY CRAP IT'S HOOOOOOOOTTTTT!!!!!

Seriously, it's like 40+ with the humidex, and if you don't have AC, like me, and don't have a pool(appartment on a second floor in the city...), this heat is suffocating. You gotta find ways to stay cool, and eating in this heat is not very enjoyable. I don't wanna turn on the oven, or even one element, even the microwave has been silent for the past 4 days. Now, everybody will say you have to eat spicy foods, that's what they do in hot countries, I know...but I live in Canada. I don't particularly like this heat and I especially don't wanna eat anything hot or spicy!

So I'm relying on my trusted friend the blender and drinking shakes. Salads and light sandwiches also. Later. This morning I needed that cold drink.


1/2 cup frozen mango
1 cup orange juice (might be a little more...)
1 BIG scoop vanilla FROZEN yogurt
2-3 TBSP instant milk powder

Blend Blend Blend...
Slurp slowly to prevent brain freeze...

It tastes almost like a creamsicle...

This heat wave is supposed to end this week-end...let's hope so...

Sunday, June 27, 2010

Banana-Carrot-Cranberry Muffins


Another day off today...so after a nice little outdoor swim I had to bake something. It was gonna be a "banana-something" because I had 2 very ripe bananas begging to be used.
But I also wanted to make something with carrots, for variety and because I've been making a lot of shakes lately, I want to keep my frozen fruit for smoothies!! So, I looked through some books, found a recipe for carrot muffins, but not using bananas. And then there's my favorite recipe of banana-oat muffins, not using carrots. So I took a shot and kinda combined the two. The carrot muffin recipe looked amazing as it was though, I will try it eventually!

These came out great, they are moist and light. The molasses taste comes out a little, but not over-powering. It gives it a nice darker color too.

Ok. Here's the recipe, adapted from Marg Ruttan's "Biscuits et Muffins":
(yields 9-10 big muffins)


Dry ingredients:

2 cups sifted all-purpose flour
1 cup quick oats
1/4 cup granulated sugar
2 tsp baking powder
1 tsp baking soda
1/2 tsp salt
1/2 tsp cinnamon
1/2 tsp nutmeg
1/4 tsp ground cloves

Wet ingredients:

2 eggs
3/4 cup milk
1/4 cup molasses
1/4 cup melted butter, cooled
1 cup mashed bananas

1 cup shredded carrots
1/2 cup dried cranberries

Grease up some muffin molds, and turn the oven at 375F. Set the rack in the middle.
Mix all the dry ingredients in a big bowl, set aside.
In another bowl, mix all the wet until lightly frothy.
Pour the wet mix in the dry mix, along with the carrots and cranberries, mix until just combined, without over-mixing.
Scoop in the muffin tins(ice cream scoop works best), and bake for 20-25 minutes.
When they're done they will spring back when you press on them, or do the knife test...
Cool for 10 minutes in the molds, then carefully unmold and cool on a wire rack.

Very nice and tender muffins.


With margarine and a glass of juice, it's a nice little pre-workout snack or afternoon sugar fix.

Tuesday, June 22, 2010

Honey-Nut Cake

Today I had the day off, so I decided to bake something. It was either that or go for a bike ride, I chose the sweet treat!


I wanted to try a new recipe from my favorite baking book, looked through and decided to go for this cake. It sounded really nice, different, and I had all the ingredients on hand. Even the skim milk powder!! I bought it months ago, thinking it would be good for shakes, but it sat in the pantry for a long time until now. This recipe calls for only 2 Tablespoons of it but hey, now that the bag is open I WILL use it in shakes..!
In this recipe there's a lot of honey, and that flavor comes out so nicely! The ground ginger tones it down a bit, but the honey!! It's beautifully sweet and it makes the cake nice and yellow.
Okay, so here's what you'll need:

Dry ingredients:

2 cups all purpose flour, sifted.
1 tsp baking soda
1/2 tsp ground ginger
pinch of salt

Wet ingredients:

3/4 cup honey
3/4 cup unsweetened applesauce
1/3 cup low-fat milk
1 egg
2 egg whites
2 TBSP instant skim milk powder
1 TBSP canola oil
1 TBSP vanilla extract

1/2 cup chopped walnuts

Turn the oven on at 350F, set the rack in the middle.
Mix all the dry stuff and set aside.
Mix all the wet stuff until frothy, pour in the dry stuff, add walnuts and mix until just combined.
Pour in an oiled 8-inch square pan, smooth the top and bake for 35-40 minutes.

When it's done, the top will spring back when you press on it gently in the middle.
Cool for 10 minutes in the pan, on a wire rack.


Unmold and cool completely on a rack.
.......................................

Enjoy with some frozen yogurt or ice cream!


I decided to leave the cake dry but a nice lemon or orange glaze would be really nice with this. Or a berry coulis of some sort...

Friday, June 18, 2010

Blueberry-Yogurt Smoothie

I've been really out of touch lately!! Like I said in a previous post I'm working full time, always around food so I get food from work and don't really cook anymore. Or when I do it's something quick like spagehtti and tomato sauce or rice and sunflower seeds. The other day I got home at 8 and had a bowl of cereal for diner. tst tst...
Anyway so this morning I was able to sleep in a bit, so after waking up so rested I felt like a nice cold liquid breakfast.


Well, I'm having toasts on the side as well but that's not what this post is about...even though they're real good toasts with my homemade bread and Nutella, my favorite spread E-V-E-R!!
Ok moving on...
For one smoothie:

Throw in a blender, or a magic bullet if you have one that works...:

1/2 cup frozen blueberries
1/2 banana(or a whole one if it's a small banana)
Cover with orange juice
1/2 cup plain yogurt(i like Activia because it's creamy and a bit sweeter than most plain yogurts I've tried, and the commercials are true...it will do wonders for your digestive system!!)
2 TBSP ground flax seed(for omega-3's and protein)

Blend, blend, blend...
Pour in your favorite glass and enjoy!

Saturday, June 5, 2010

Two recipes: Apple-Cheddar Bread and Chicken salad sandwich.


It was time to bake a bread for the week today. And once again I kinda just threw it together hoping it would be edible...and it is so nice! The apple in it doesn't really come out in the taste but it adds a nice moisture, as does the cheddar cheese. I was hoping for a stronger taste but nevertheless, this is gonna make great sandwiches and toasts.
Actually, I had a chicken salad sandwich with this bread for diner, and the "recipe" follows this one. This post here is kinda like a 2 in 1...since I don't have a whole lot of time anymore to cook, bake and post stuff on this blog, I give you 2 recipes in the same post. Aren't I generous??!
So for the bread, I got inspired by the cheddar-jalapeno bread from a month or so ago. I really liked how the cheese softens the bread. I used medium cheddar, but for a stronger taste I would use strong or extra strong cheese. The apple, as I mentionned earlier is only for moisture. If I'd had apple juice I would've thrown some in but I thought of it AFTER the trip to the grocery store...oh well...
Here's the formula:

4 cups bread flour
1/2 cup quick oats
1 1/4 tsp instant yeast
1 tsp salt
1 TBSP sugar
1tsp apple jelly(the jar was almost empty...had I thought of it ahead of time I would've bought a new jar and added a lot more...)
1 apple, peeled amd shredded (do this at the last minute to prevent the apple from browning)
3/4 cup cheddar cheese, shredded(throw in a pinch of flour in it so it doesn't clump together...)
1- 1 1/2 cup warm water, at 120F

Mix flour, yeast, salt, sugar and oats in a bowl.
Heat up the water, add jelly, pour in the flour while stirring with a fork, add the cheese and the apple and stir stir stir until it comes together in a ball. Transfer to a floured surface and knead for about 10 minutes, adding more flour or water as needed.
When it's nice and smooth, let it rest for 5 minutes, put in an oiled bowl and cover. Let it rise for about 45-1 hour.
Punch it down, gently, and shape:


*This time I decide to do kind of a braid: cut the dough in 3 equal pieces and roll into logs. Stick the 3 ends together and braid as normal...well, as you can tell on my "before" shot, I don't remember how to braid...oh well...still looks pretty.
Put the dough in a loaf pan, or on a sheet, and proof for about 30 minutes, until it's double in size.
Brush on some egg whites (right before sending it to the oven...).
Bake at 375F for 35-40 minutes.
When it's ready it'll sound hollow when tapped on the bottom.
Cool on a rack.


Isn't it so pretty-looking?

I'm sending it to Susan at Yeastspotting, a gorgeous website about bread and baking, showcasing a wide variety of breads from Ms.Yeastspotting herself and other bloggers passionate about bread. Love that website! Go check it out!!

------------------------------------------------------------------------------------

Now for the second recipe...
For diner I really wanted to use that bread for something, and toasts with jam(my first choice) is not really diner so I went for a sandwich. I thought of just grilling a chicken breast and sticking it between 2 slices, but that delicious fresh bread deserved better than that. So I made a nice little chicken salad.


For 1 sandwich:
Heat olive oil in a pan at medium high heat. Season chicken a breast on both sides with salt, pepper, paprika, oregano and garlic power. Grill in the pan(or on the "barbi"). The way I do it is this: I throw the chicken when the pan is really hot, let it cook for about 3-4 minutes on that one side, flip it, turn the heat to medium-low, cover the pan and finish cooking it, covered. Takes about 10 minutes.
When it's done, let the chicken sit on a cutting board to allow the juice to settle, and chop into small cubes. In a small bowl, mix 1 tsp dijon mustard, 2 tsp mayo, 1 green onions, salt, pepper and dried parsley. Mix in the chicken until all coated. Slab that in between the fresh slices of apple-cheddar bread with some baby spinach and enjoy!!


Have a great week, everybody!